Cloud tutorial 2
A cloud tutorial
Part 2: Grain & rain
The previous part is already okay, but for my taste the sky looks too clean, smooth & artifical. It should becomes more painterly and so we add a second cloud layer for raw grain and noise filter for fine grain
10a) Create a new empty layer; reset fore-/backgroundcolor to b/w; fill with Filter->Render->Clouds.
10b) Choose any blending mode with the most dramatic effect. (e.g. 'overlay 100%'):
11) And now the same steps 3a..5b like in the previous part:
Select 'Rectangular Marquee' with some soft edges;
Mark a half of the pic and stretch & skew it with Edit -> Transfrom -> Perspective
(In the example only the upper part)


12) Apply a color with Image->Adjust->Variations
13) Merge all layers.
You can repeat step 10-13 to get a more and more thick sky.
Fine grain:
14) Duplicate the background layer. Select this new layer
15) Add noise with Filter->Noise->Add Noise with a quantity between 5 and 15:
16) Less bluring this noised layer.
17) Adjust the blending mode, till you get the most subtil shimmering haze. Zoom out pic to control the effect:

If all experiments unsatisfied, undo and redo step 14-17
18) Merge all layers and resize the complete pic to 200%
Windy Rain:
19a) Create a new empty layer; reset fore-/backgroundcolor to b/w; fill with Filter->Render->Clouds.
19b) Choose any blending mode with the best dramatic potential. (e.g. 'overlay 100%'):

20) Image->Adjust->Equalize:

21) Filter->Blur->Motion Blur; e.g. a vertical direction and a high distance value:

(Instead of motion blur you can use any other disortion effect e.g. Filter->Disort->Wave etc)
22) In my example I delete the upper part with the up-going rain, adjust the blending mode and the color.
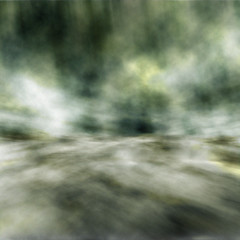
This is the final version:
![]()
Keine Kommentare:
Kommentar veröffentlichen