Montag, 16. April 2007

Cloud tutorial 2

A cloud tutorial
Part 2: Grain & rain


The previous part is already okay, but for my taste the sky looks too clean, smooth & artifical. It should becomes more painterly and so we add a second cloud layer for raw grain and noise filter for fine grain

10a) Create a new empty layer; reset fore-/backgroundcolor to b/w; fill with Filter->Render->Clouds.
10b) Choose any blending mode with the most dramatic effect. (e.g. 'overlay 100%'):


11) And now the same steps 3a..5b like in the previous part:
Select 'Rectangular Marquee' with some soft edges;
Mark a half of the pic and stretch & skew it with Edit -> Transfrom -> Perspective
(In the example only the upper part)


12) Apply a color with Image->Adjust->Variations

13) Merge all layers.

You can repeat step 10-13 to get a more and more thick sky.


Fine grain:
14) Duplicate the background layer. Select this new layer
15) Add noise with Filter->Noise->Add Noise with a quantity between 5 and 15:
16) Less bluring this noised layer.
17) Adjust the blending mode, till you get the most subtil shimmering haze. Zoom out pic to control the effect:
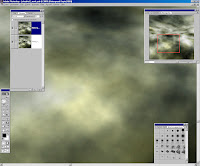
If all experiments unsatisfied, undo and redo step 14-17

18) Merge all layers and resize the complete pic to 200%


Windy Rain:
19a) Create a new empty layer; reset fore-/backgroundcolor to b/w; fill with Filter->Render->Clouds.
19b) Choose any blending mode with the best dramatic potential. (e.g. 'overlay 100%'):
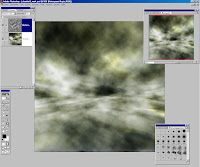

20) Image->Adjust->Equalize:
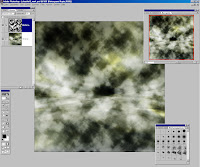

21) Filter->Blur->Motion Blur; e.g. a vertical direction and a high distance value:
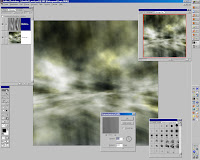
(Instead of motion blur you can use any other disortion effect e.g. Filter->Disort->Wave etc)


22) In my example I delete the upper part with the up-going rain, adjust the blending mode and the color.
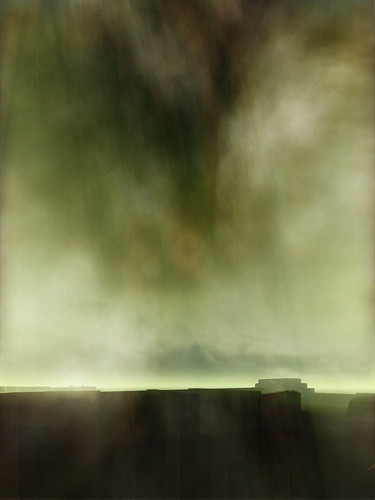
This is the final version:
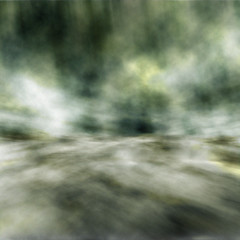
cloudtut3_work

Freitag, 13. April 2007

Ye-Me-Le 1

Current series #1952; create with ArtRage:


Final version:
Ye-Me-Le

Mittwoch, 11. April 2007

Cloud tutorial 1

A cloud Tutorial:
Part 1: The base cloud


Examples of use:
The angels of SodomGormenghastNebëhr Gudahtt"My God, it's full of sauerkraut!"
Die Oktobergöttin der Bierleichen blickt auf ihr Volk herabLP-Cover for a forgotten prog-bandEin Ünchner im ImmelOceanus Hopkins

1) Start with a new small, sized empty pic (e.g. 800x800):


2a) Reset foreground/background color to b/w
2b) Filter->Render->Clouds:


3a) Duplicate layer (to cover possible holes while later stretching). Select this new layer
3b) Zoom out to 33% or less (e.g 25%)
4a) Select Tool 'Rectangular Marquee' with a double click; set smooth to a any value (e.g. 8)
4b) Select the upper half of the pic (not excatly the center line - set the horizon where you want..):


5a) Edit -> Transfrom -> Perspective
5b) Stretch and skew the selected part by the top edge:


6) Select the lower half of the pic
7a) Edit -> Transfrom -> Perspective
7b) Stretch and skew the selected part by the bottom edge


8) Colorize the cloud layer with Image->Adjust->Variations:


9) Merge all layers:


To be continued... ( 'Grain & Rain')

Dienstag, 10. April 2007

Demeter

Current poser series #1949.

1) Construction with Poser 5.
Taking standard female figure and any sitting pose;
adding some cubes as 'throne' and any background cloud pic:


(with some emphasized examples tits while rendering)

2) After reendering and cropping some tuning with PS:
A layer for fine grain (with noise filter ),
a layer for raw grain (with b/w-clouds)
and a layer for warm color tuning:


3) Final version:
An angel of Sodom

Dienstag, 3. April 2007

Angel of sodom

Start creating another wet-clouds-picture with Photoshop 'cloud reendering' and 'perspective stretching':


Some merged layers later:


And the final version after another half dozen layers and some cubic, ancient-city-like structures in the foreground:
The angels of sodom